Canvas Navigation
The Canvas is the section of uScript where you create and edit your visual graphs. The uScript Canvas is infinitely large, allowing you to move out in any direction from the initial "home" position in order to create as much visual logic as you like. This of course though leads to the problem of making sure you can still find everything you have created and to quickly be able to move to where you wish to be on the Canvas.
Note! - learn the hot-keys you can use with the Canvas to really become a power user! See "Hot-Keys"
Moving Around The Canvas
Panning
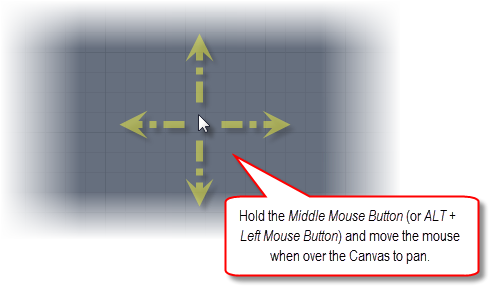
One of the first thing you will want to do is to pan the Canvas around. This is easily accomplished by holding down the Middle Mouse Button while over the Canvas and moving the mouse. If you don't have access to a mouse with a middle mouse button, you can optionally use ALT + Left Mouse Button instead.
Other Ways To Get Around
uScript also offers several other useful ways to get around the Canvas and find what you are looking for.
Contents Panel
The Contents Panel can be a great way to see all the nodes currently on the Canvas. It also allows you to quickly select the nodes or jump the Canvas focus to a node. For information on accessing the Contents Panel, see "Editor Interface".
Here is an example of the contents Panel for a graph with several nodes on it:

Each "node button" in the list allows you to either select the node (by clicking on the node button itself) or move the Canvas view to center over the selected node (by pressing the search button on the right side of each node button):

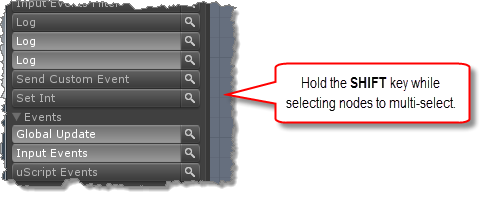
Nodes can also be multi-selected by holding down the SHIFT key while clicking on the node buttons:
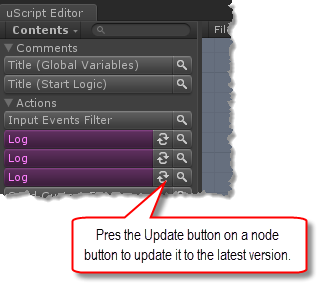
When nodes on the Canvas are out of date, either because they have been updated in a way that might cause data changes or loss or because the Deprecated attribute was added to a node, the node button for that node will show up as a purple/pink color and add a new button option for the node, allowing you to update the node:
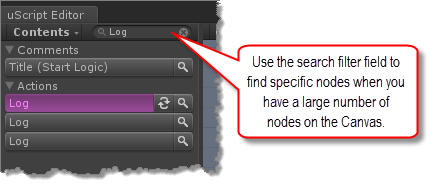
You can also use the Search Filter Field to help you narrow down the nodes visible in the list to help you find things quickly:
Home Key
You can use the HOME key to quickly reset the Canvas position to its center.
Event Node Focusing
Since all graph logic starts with an Event Node, it can be very helpful to quickly jump Canvas focus between the events nodes to find the logic you are looking for. In uScript you can do this by pressing the bracket keys on the keyboard ( "[" and "]" ). These two hot-keys will move the canvas focus to the next/previous Event Node.
Canvas Zooming
To zoom the Canvas in and out, you can the Scroll Wheel on your mouse. If you do not have access to a Scroll Wheel on your mouse (or equivalent on laptop touchpads), we also have some hot-keys to allow for zooming.
Fixed Zooming
You can also perform fixed zooming using keyboard hot-keys. Fixed zooming means that uScript will auto zoom to specific percentages when the key is pressed. This allows for much faster zooming with hot-keys.
The hot-keys to zoom are the:
- MINUS key (-) - zooms out at 10% increments
- EQUALS key (=) - zooms in at 10% increments
- ZERO key (0)- resets the zoom level to 100%
Note! - these hot-keys are on the main keyboard. The same keys on the numeric pad of keyboards that have them will not work (as they are different keys).
Node Manipulation
Once you know how to move around the Canvas, the next most important step is to be able to manipulate the nodes on the Canvas.
Note! - all node manipulation can be undone using the Undo/Redo system in Unity. Simply use the standard Undo/Redo hot-keys; CONTROL+Z for Undo and CONTROL+Y for Redo (Use COMMAND instead of CONTROL on the Mac)
Placing Nodes
There are three main ways to place a new node on the Canvas.
Using The Toolbox
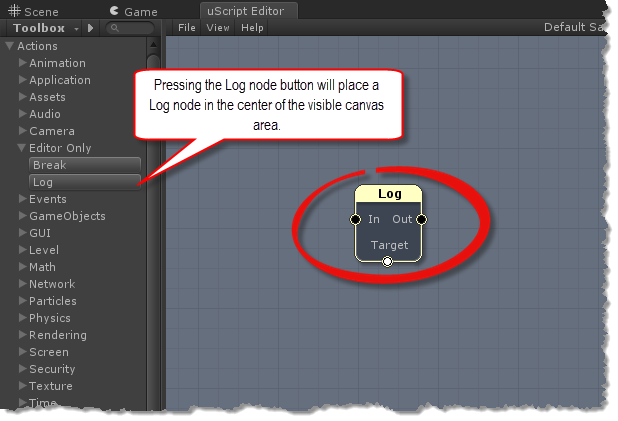
The first is to select the node's node button on the Toolbox. Clicking on the node button will place an instance of that node in the center of the visible Canvas and automatically selects the new node:
Canvas Context Menu
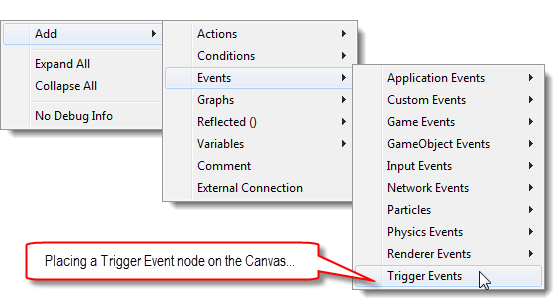
Another way to place new nodes is to Right-Click on the Canvas and use the Canvas Context Menu. Once the Context Menu appears, go to the "Add" section and navigate to the node you wish to place. Once you have selected the node you want, it will be placed at the position on the Canvas where you right-clicked:
Copy Paste An Existing Node
Lastly, you can simply copy an existing node on the Canvas and paste it as a new node. When you do this, the new node will have all the same settings as the old node you copied it from. However, no connection hooked into the original node will be made, allowing you to quickly setup a new node based on an existing one.
Selecting Nodes
To select nodes on the Canvas just Left-Click on the node you wish to select. It will highlight with a yellow border. To deselect a node (or multiple nodes), just Left-Click on a blank area of the Canvas grid.
If you wish to select more than a single node at a time, you can also use the following hot-keys:
- CTRL+A - this will select all nodes on the Canvas.
- SHIFT+Left-Click - allows you to multi-select node and toggle their selection state on or off.
Selection Box
Lastly, you can draw a selection box. This will select all nodes that it touches. To create a selection box, just Left-Click on the Canvas and drag the mouse cursor. The selection box will be drawn out as you move the mouse cursor away from its starting location.
You can also use the following hot-keys with box selection:
- SHIFT - holding the SHIFT key while doing a box selection will add new nodes to the current selection.
- CONTROL - holding the CONTROL (CMD on Mac) key, will remove nodes from the current selection.
Contents Panel
You can also select nodes by using the Contents Panel. Information on using the Contents Panel to select nodes can be found above in this section.
Moving Nodes
Moving nodes is as simple as Left-Clicking on a node and dragging it with the mouse. If more than one node is currently selected, just Left-Click on any one of them to drag them all together.
Deleting Nodes
To delete nodes, first you must select them. Press the DELETE or BACKSPACE key to delete selected nodes on the Canvas.