Making A Prefab Graph
Unlike a regular "scene graph", which in many cases only works in the Unity scene that it was made for, a "prefab graph" is a graph that is designed to work with any GameObject it is assigned to-- regardless of the scene or how many GameObjects have that graph assigned. It is called a prefab graph because most of the time, that is what you will use these graphs on (Unity prefabs), but they can work on any GameObject really.
Note! - This tutorial assumes you have completed the initial tutorial (see "Your First Graph"), or are at least now familiar with both Unity and uScript editors and their basic interface and functionality (like how to create GameObjects and child GameObjects in Unity, and saving graphs and how to find and place nodes in uScript).
When To Use Them
A prefab graph isn't actually made any differently than a normal scene graph actually-- it is just about following a couple of rules and using a special variable uScript provides to allow you to make graphs that do not rely on anything in a Unity scene specifically.
You want to make a graph a "prefab graph" anytime you want to:
- Make a graph that is going to be part of a Unity prefab.
- Make a graph is easily reusable and assignable to any GameObject and in any and/or multiple scenes/levels/maps.
Take this scene graph example:
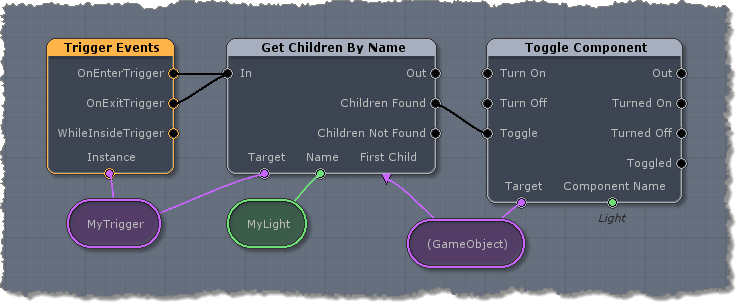
It is assigned to the Master GameObject in the scene (_uScript) and it is looking for a specific trigger GameObject called "MyTrigger". When MyTrigger is entered by the player (well, by anything in this setup) it will look for a child GameObject of the Trigger called "MyLight" and will toggle the light's "Light" component on and off (turning the light on and off).
Here is what the GameObject setup looks like in Unity's Hierarchy tab for reference:
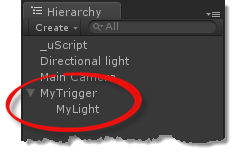
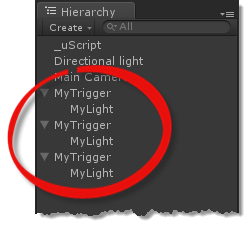
Simple enough and this will work great. What happens though if you want to have these MyTrigger GameObjects setup all over the place-- or use them in all your game's levels/maps? The first problem that can arise is just wanting more than one of these in your level: Let's say we want three now:
Well now you might have a graph that looks like this:
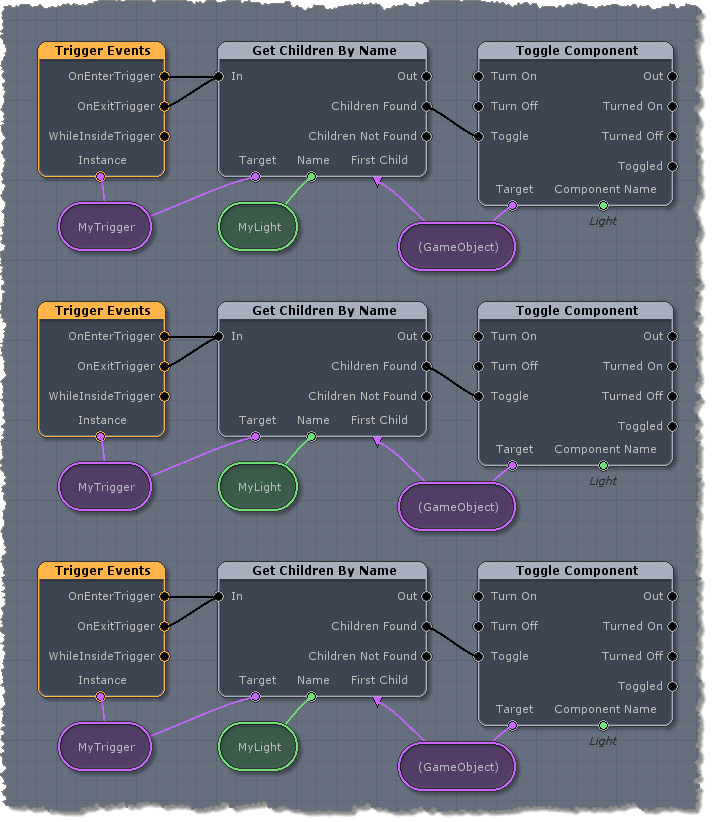
The bad news is that this won't even work because you now have three GameObjects called MyTrigger! Now Unity and uScript won't know which MyTrigger GameObject goes as the Instance for which Trigger Events event node because they are all named the same (the same holds true when trying to find the child MyLight GameObject on the Get Children By Name node)!
In order to fix this we would need to manually rename two of them and then update the graph to point to them:
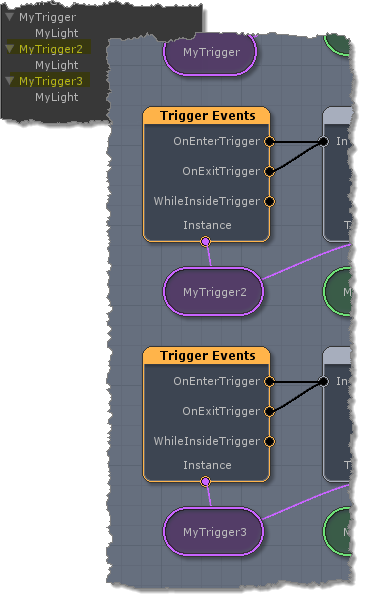
Not only is that a pain to do-- but what if you want 50, 100, or 5000 instances of that trigger and light setup in your level?!? What if after you do all that work there is a bug-- or you want to change or add more logic to that setup (like also play a sound)-- you would have to manually add the logic to every one manually (and we have games to make here!!! )? You can see that this would all get out of hand very quickly!
You really don't want this:
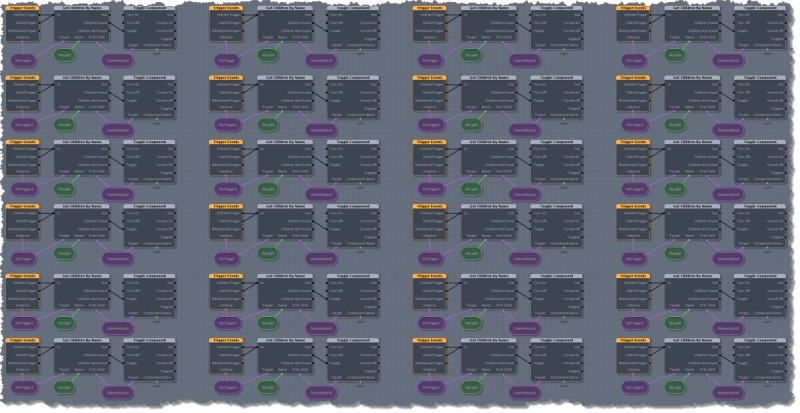
This is where prefab graphs come in. Let's take this example and show you a much better way to do something like this...
The Prefab Graph Way
To instead create a prefab graph that can easily control as many MyTrigger setups as you might have in your game, we just need to do a couple of things differently.
Scene Setup
Before we get started, please create a new Unity project with uScript installed. You might also want to installed Unity's Character Controller if you plan to easily run around and test your work. If you do that I also suggest putting in a Plane for a floor to run on!
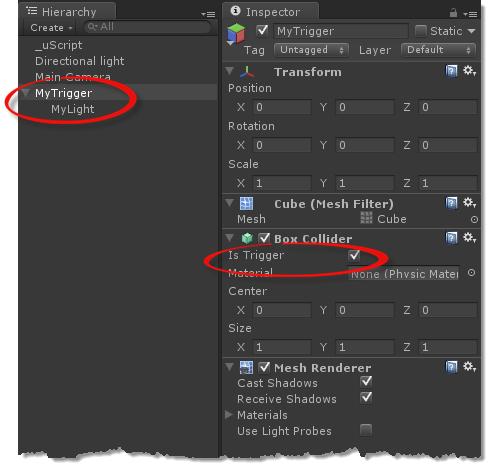
Then create a new GameObject called "MyTrigger" with a Box Collider component (I just placed a Cube GameObject), as well as a child Point Light GameObject called "MyLight". Be sure to set the "Is Trigger" flag on MyTrigger so it will work with the Trigger Events action node:
Step 1 - Let's by making a new graph in uScript and saving it:
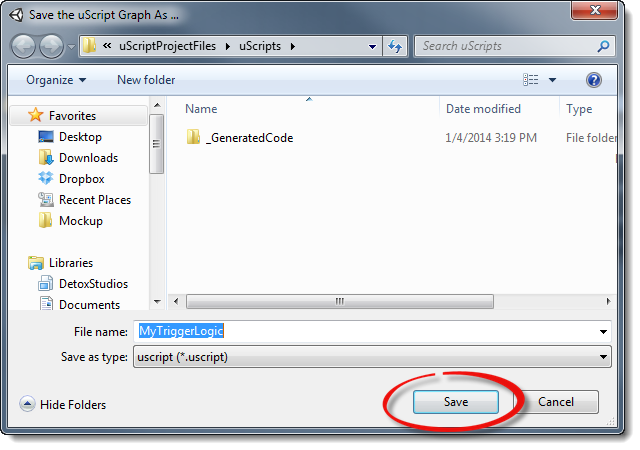
1. When the Save dialog comes up, call this graph "MyTriggerLogic" and press the Save button:
2. When asked if you want to assign this graph to the scene's Master GameObject (_uScript), select the "No" button:
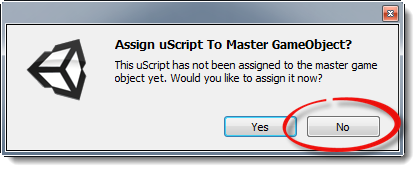
Selecting no here will tell uScript to not assign this graph to any GameObject. This means that before the game will use it we will need to manually assign it to the GameObject in the scene we want to assign it to.
Step 2 - Now that we have created a new blank graph and saved it, we should go assign it to the GameObject we want it on manually.
Note! - assigning your graph to specific GameObjects and Prefabs manually instead of using the Master GameObject of the scene is the key to creating a Prefab Graph!
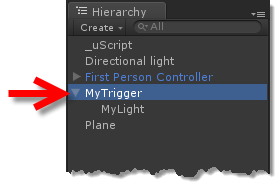
1. Select the GameObject you wish to assign the MyTriggerLogic graph to in Unity's Hierarchy tab (MyTrigger):
2. Then, with the MyTrigger selected, go to Unity's Component menu and choose the MyTriggerLogic graph from Component/uScript/Graphs/
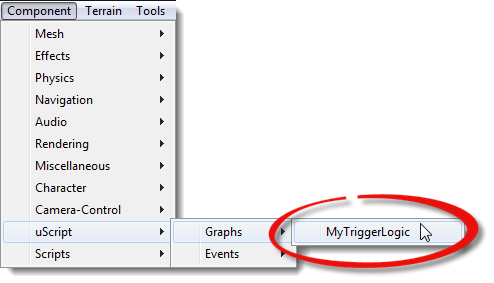
This will assign your graph to the selected MyTrigger GameObject in the scene:
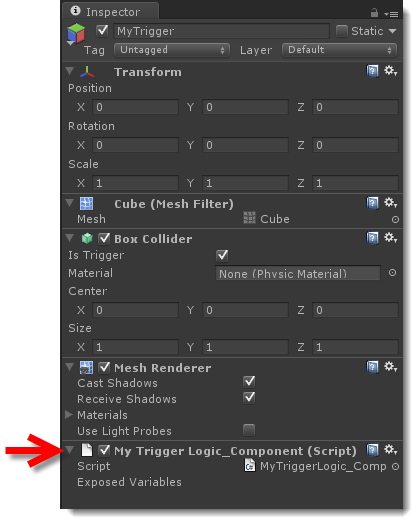
Step 3 - Now that our graph is assigned to the correct GameObject, we can go back into uScript and create the graph logic we will need.
1. First let's place the Trigger Events event node. Find it in the Toolbox and left-click it to place one on the Canvas (remember that you can also use the Toolbox's search filter to help you find things quicker!).This node will allow us to know when the trigger is hit:
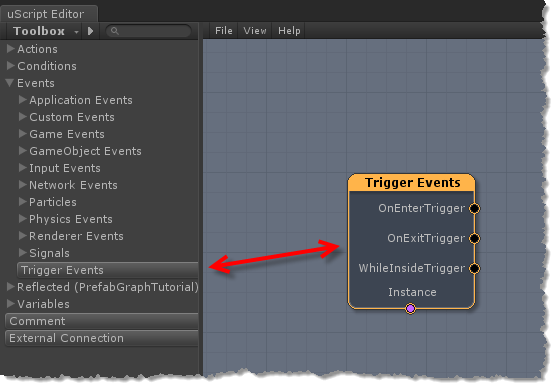
2. Now we need to setup the Trigger Events action node's Instance property to tell Unity which trigger we want to use for this node.
Normally we would just go into the Properties Panel for this node and assign the GameObject we want to use there (don't do this)...

... or you might place a GameObject variable node and hook it up externally (don't do this either)...
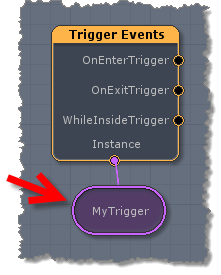
As explained earlier in this tutorial however, assigning a specific GameObject is a bad way to go if we ever want to use this logic more than once because then we have to manually rename copies of the MyTrigger GameObject.
Instead, what we want to do is to use a special variable node called the Owner GameObject variable. This variable can be found in the Toolbox under the Variables section of the node tree:
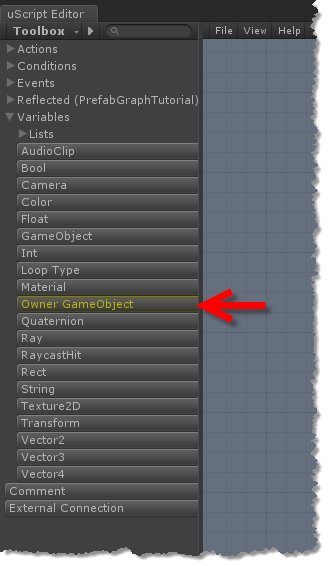
Clicking that will place an Owner GameObject variable node onto the Canvas:
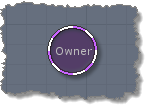
This variable is of the type "GameObject" and can be hooked up to any node socket that works for regular GameObject variables. The difference however is that you don't assign a GameObject to it. Instead, the variable will always use the GameObject that the graph is assigned to.
(Do this!) Go ahead an hook it up to the "Instance" socket of the Trigger Events event node:
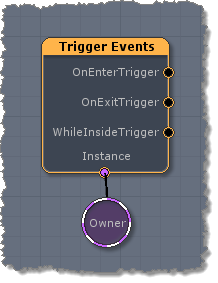
What you have done is told Unity -"use whatever GameObject this graph is assigned to as the trigger for this node".
This one variable type opens the door to making graphs that are not "hard coded" to work with a specific GameObject from a scene and instead can be assigned to any GameObject.
Step 4 - We are no ready to build the rest of this graph. Next we should hunt for the child GameObject named "MyLight" so we can toggle it on and off.
1. Place a Get Children By Name node to the right of the Trigger Events event node on the Canvas (you can find it under Actions/GameObjects/ in the Toolbox):
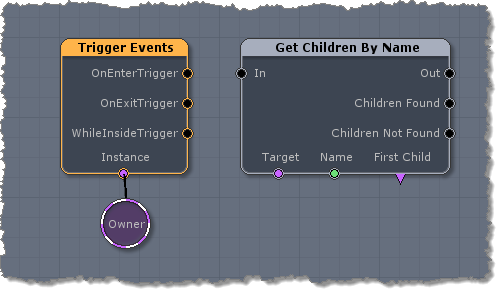
This node will allow us to easily find the MyLight child GameObject so we can access it to turn it's light on and off.
Note! - You may notice that my node seems to be missing the "Children" variable output socket on the bottom of the node. That is because we don't need it for our logic and I hid it by unchecking the socket in the Properties Panel for the node:
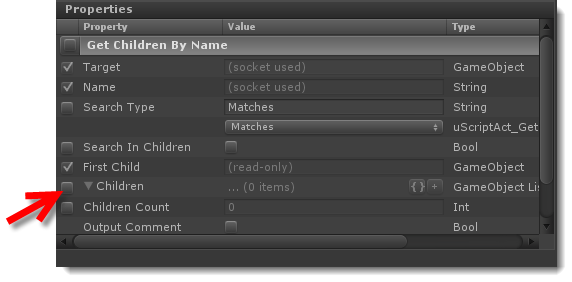
2. Connect both the "OnEnterTrigger" and "OnExitTrigger" sockets of the Trigger Events action node to the "In" socket of the Get Children By Name node:
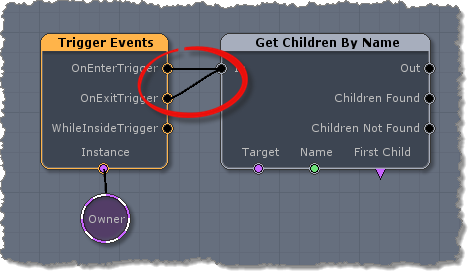
By connecting both sockets to it we will send a signal to the node (and the nodes hooked up after it) every time something either enters of leaves our trigger volume.
Step 5 - Now we need to setup the Get Children By Name node's properties.
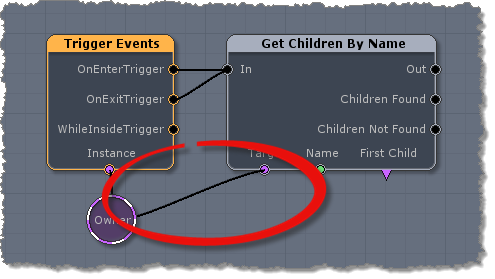
1. First we need to choose the "Target" for this node. The Target property tells the node which GameObject we want to look for children on. We know this should be the same GameObject that the trigger is on (the MyTrigger GameObject in this case), so we just need to assign it to the Owner GameObject as well (again, this tells Unity - "use whatever GameObject this graph is on as the Trigger"). Drag a connection line from the "Target" socket to the existing Owner GameObject variable that is already connected to the "Instance" socket of the Trigger Events event node:
2. Now we need to choose the name of the child GameObject to search for. In our case this will be a GameObject called "MyLight". You could go ahead and type this into the "Name" property in the Properties Panel, but let's go ahead and use a trick to quickly make an external String variable that is hooked up to the socket.
Right-click on the "Name" socket of the Get Children By Name node. Select "Create Linked Variable" from the context menu that pops up:
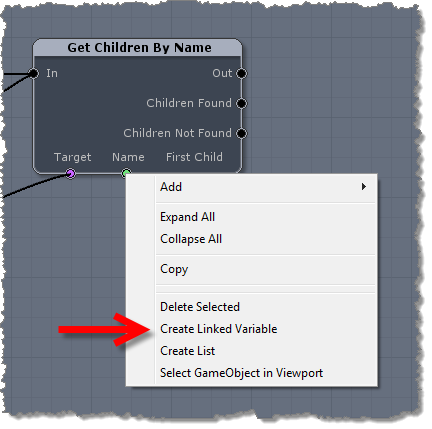
This will automatically place a variable of the correct type on the canvas for you and have it hooked up to that socket.
Go ahead and move the variable a bit lower and type "MyLight" (without the quotes) in as the value for the variable via the Properties Panel:
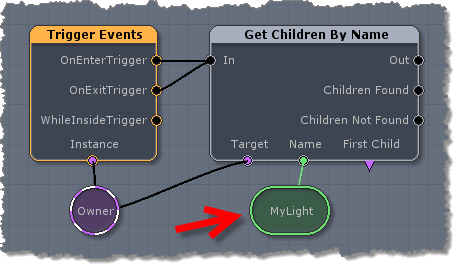
3. Lastly we need to add a GameObject variable to the "First Child" variable output socket on the Get Children By Name node. This is where the node will return the GameObject we need to use for the next bit of logic.
Let's use another shortcut to create the GameObject variable we need. Try holding down the "G" key on your keyboard and left-click on the Canvas below the node. You should now have a new GameObject variable there. Go ahead an hook it up to the node's "First Child" socket so that your graph looks like this:
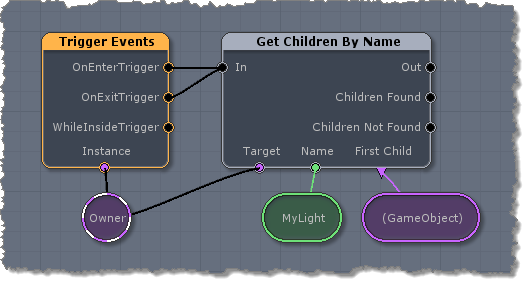
It is fine to leave this new GameObject variable node blank. It will get populated with a value once the node is run because it is a variable output node (notice the triangle shape of the socket). To learn more about variables, see "Variables" and to learn more about sockets, see "Nodes").
Step 6 - Now that we have the MyLight child GameObject going into our new GameObject variable, we can place our last node to turn the light on and off. One of the easiest ways to turn a light on and off in Unity to to enable or disable the Light component of the GameObject. A node that is perfect for that is the Toggle Component node.
1. Find the Toggle Component node in the Toolbox and place one on the Canvas to the right of the Get Children By Name node:
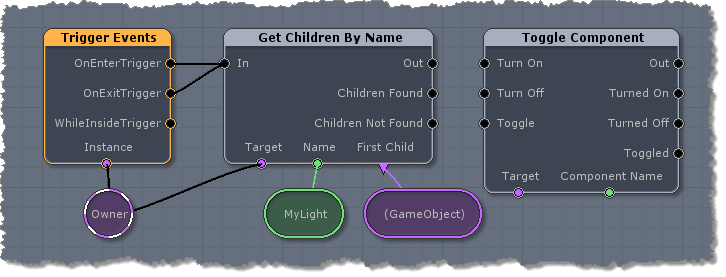
2. Connect the "Children Found" socket on the Get Children By Name node to the "Toggle" socket on the Toggle Component node.

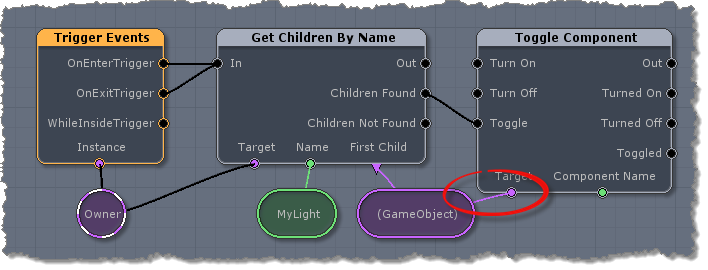
We are using the "Children Found" socket so that we will only try to toggle the Light component if the MyLight child GameObject was found.
Step 7 - We are now ready to set the properties of the Toggle Component node.
1. First we need to choose the Target (the GameObject whose component we want to toggle). In this case we want to use the GameObject variable that contains the MyLight GameObject that was found by the Get Children By Name node. Go ahead an connect the "Target" variable socket to that GameObject variable node by left-clicking in the center of the "Target" socket and dragging the line over GameObject variable and letting go:
2. No we need to tell the Toggle Component node which component of the Target GameObject we want to toggle on and off. In our case it will be the Light component.
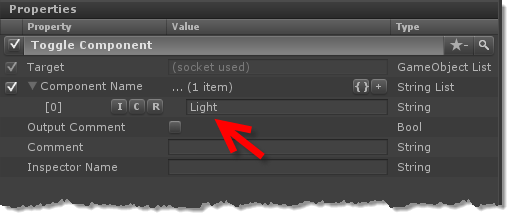
We need to select the node and input "Light" (without the quotes) into the "Component Name" property within the Properties Panel. However, when we go to do that we see that there isn't anywhere to input the value!
This is because this node let's you input more than one component name at a time to toggle and therefor uses Unity's default array list UI. Just click on the little "+" button to create a field to input the value:
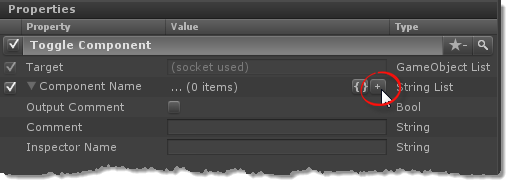
Once you have done this and entered the value "Light" in the property, it should look like this:
You should now have a completed graph that looks like this:
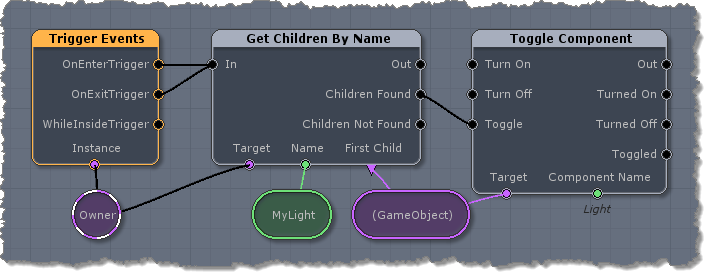
Our graph is now completed! If you had setup a scene for testing, you should be able to run into the trigger and watch the light turn on and off as you enter/exit it.
You have made a prefab graph!
Extra Credit
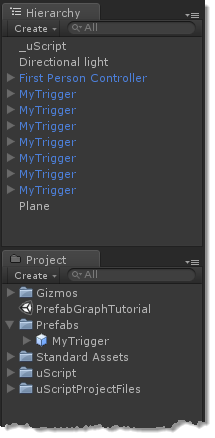
If you wanted to really see the power, you could turn the completed MyTrigger setup into an actual Prefab in your project (see Unity's documentation about doing that!) and place many instances of the MyTrigger prefab in your test project. You will see that they all work independently from each other.
You could then also add more logic to the single prefab graph (such as playing a sound of something even cooler) and all your prefabs will automatically inherit the changes because they are all using the same graph.
Many MyTrigger Prefabs in the scene:
