Your First Graph
In this tutorial, we will create a very simple graph that will rotate a cube GameObject when you use the arrow keys on the keyboard.
Please note that at first glance this may look like a very complicated tutorial, but it is in fact a very fast and easy graph to make once you know what you are doing (you could do this in 1-2 minutes total once you know what you are doing!). This tutorial is very detailed with many small steps, explanations, and tips along the way to try and make sure it covers almost any level of user. Take the time to read each step carefully and you will learn lot's of helpful things along the way!
Project Setup
This section of the tutorial focused on creating a new Unity project with uScript installed and setting up the cube GameObject that we will control.
Step 1 - Open Unity and create a new, empty Unity project called "MyFirstGraph".
Step 2 - Install the latest version of uScript into this project (see "Installing & Updating" if you need help installing uScript).
You should now have an empty project with two uScript folders (uScript and uScriptProjectFiles) showing in the Project tab in the Unity editor. The uScript folder is where the actual uScript editor files are while the uScriptProjectFiles folder is where all the files you create that are related to this specific project will go. It is important for uScript to store all your project uScript content here and not in the uScript folder so that you can easily update uScript without accidentally overwriting or deleting your project-specific content:
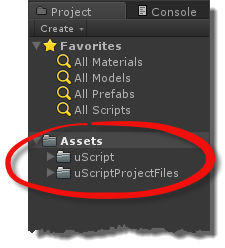
Note! - If you use third-party nodes or create your own custom nodes, you should put them in the Nodes folder found within the uScriptProjectFiles folder. Putting your nodes (or anything else) inside the uScript folder structure puts them in danger of being overwritten or deleted if you ever update your uScript installation!
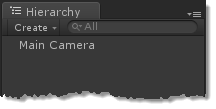
You should also see a single camera GameObject called "Main Camera" in the Hierarchy tab in the Unity editor (newer versions of Unity such as Unity 5 will also have a "Directional Light" GameObject by default):
Step 3 - Open the uScript editor for the first time by going to Tools/Detox Studios in the Unity menu bar and selecting uScript Editor. Note that you can also use the hot-key Ctrl+U (Cmd+U on Mac) to run uScript if you like:

When running uScript for the first time, you will get several windows that pop up that might include asking you to enable/disable auto-update checking, a license agreement window, and a welcome window with helpful links.
You should now see the uScript window appear:
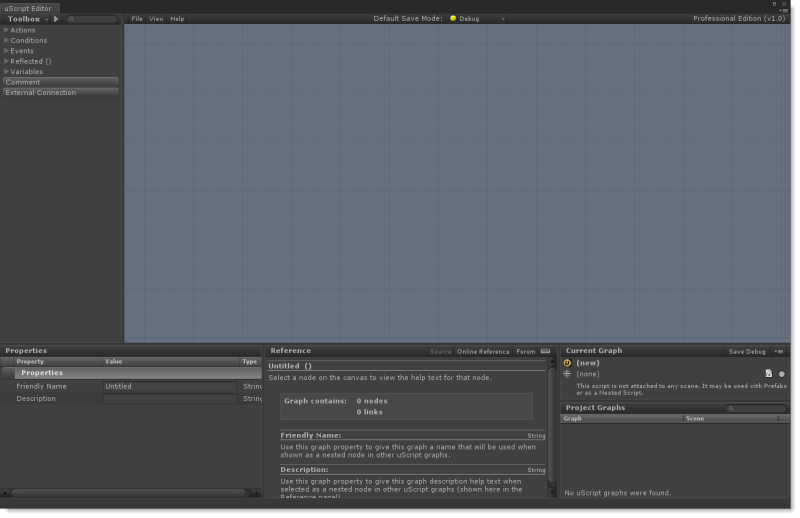
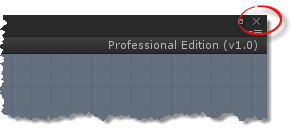
Step 4 - Go ahead and close the uScript editor window by either clicking on the window's close button at the top of the window (a red dot on the left for Mac, or a X button on the top right for Windows):
Notice that uScript adds a couple of new things to your Unity project when it is run for the first time:
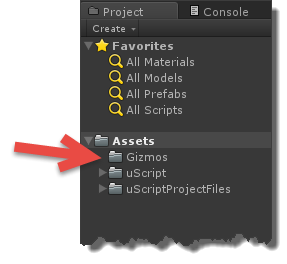
Gizmo directory:
Unity uses this folder to store icons used in the Scene tab of the Unity editor for visualization purposes. We use some uScript icons to help you see what GameObjects are being used by uScript (see the Unity documentation to learn more about gizmos). If the Gizmo folder did not already exist in your project (like in this case), we make it when adding our gizmos:
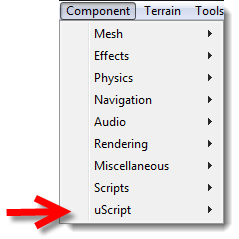
A new section in the Components menu:
We have also created a new section in the Components menu in Unity's menu bar. This will be used in the future to quickly assign Prefab Graphs and other helper script components to GameObjects in your scenes. For now you can ignore it.
Step 5 - Now we need to create the cube GameObject we will be spinning in this tutorial. To do this, just go up to the GameObject menu in Unity's menu bar and choose GameObject/3D Object/Cube to create a new cube GameObject in your scene called "Cube":

Step 6- For Unity 3 or 4, we should also place a light in our scene so we can better see the Cube. To do this, go back to the GameObject/Create Other menu in Unity and select "Directional Light" to put a new directional light in to your scene. Unity 5 should already have a directional light by default.
Feel free to move it away from your cube if you like (you can do the same with the _uScript GameObject as well if you like-- it won't hurt anything if you move it somewhere else in your scene). You should now have a Scene view in the editor that looks something like this (if you did indeed move your light an d_uScript objects away form the center of the world):
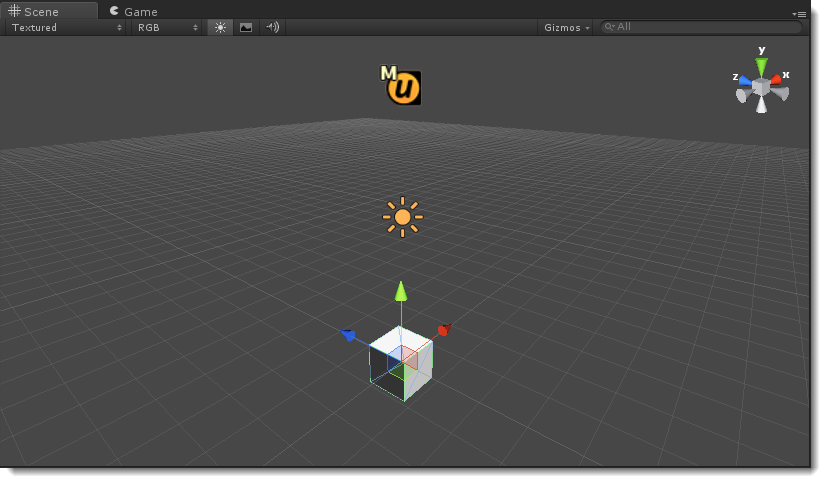
For my setup above, I changed the Y position on the Directional Light GameObject to "4" through the Unity Inspector tab.
Step 7 - Lastly, lets get the camera into a better position so we have a more useful view of the Cube when we rotate it. To do this:
1. Select the Main Camera GameObject in the Hierarchy tab in the Unity Editor:
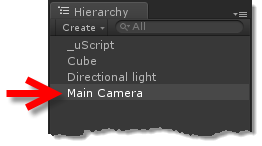
2. In the Transformation section of the Unity Inspector tab, change the following values:
Position Y: 3.5
Position Z: -5
Rotation X: 28
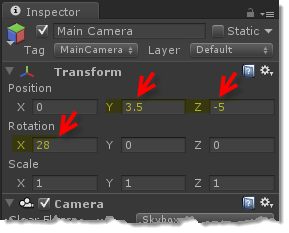
Step 8 - Now we can save our Unity scene before continuing. To do this, just go up to the File menu in Unity's menu bar and select "Save Scene":
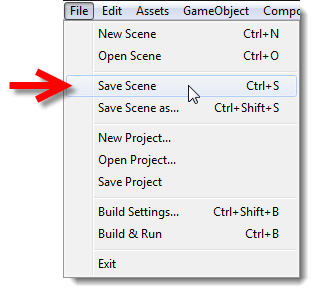
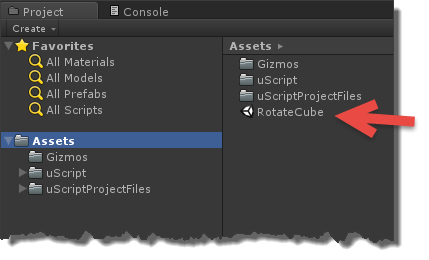
You should get a popup asking for a name and location to save the Unity scene. Just call the scene "RotateCube" and save it in the current default location. You should now see this file appear in Unity's Project tab:
Our scene is now set up and we are ready to start using uScript!
Making the Cube rotate with uScript
This section shows you how to use uScript to make the Cube rotate left and right using a uScript graph.
Step 9 - Now let's create a graph to control the Cube's rotation.
1. Open the uScript editor again using either the hot-key (Ctrl+U on Windows or Cmd+U on Mac) or by going to the Unity menu bar and selecting Tools/Detox Studios/uScript Editor.
2. Once the uScript editor is open, go to the File menu above the uScript Canvas and choose File/Save Graph:
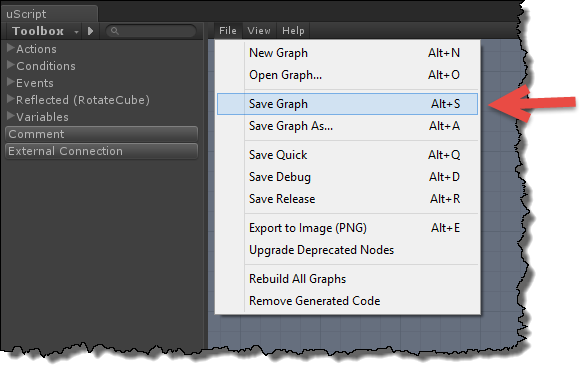
3. Save the file with the name "CubeController" in the default location. Note that when you press the Save button, uScript will pop up a window asking you if you wish to assign this graph to the Master GameObject. Because this is a simple scene graph, choose the "Yes" button to continue (if we were making a Prefab or Nested Graph we would have chosen "No"-- more on those in later tutorials).
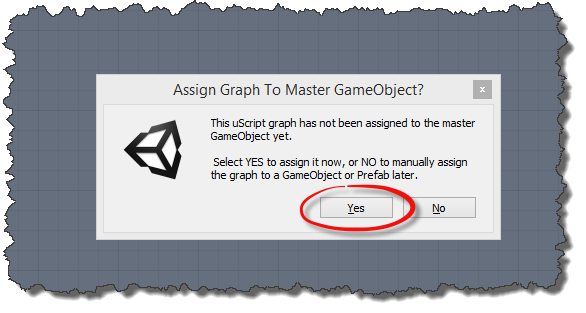
Note! - when you save the graph, uScript will automatically create the C# script files Unity will use in the game (see the "Generating Script Code" section of the "Graphs" topic for more information on this). When Unity detects any new or updated script files in the project it will automatically recompile your scripts. uScript will pop up a notice when this is happening. Just wait it out before continuing on. The speed of your script recompile will vary with your computer and project size/complexity of scripts:

Once your graph is saved and Unity has recompiled scripts, proceeded to Step 10.
The _uScript GameObject:
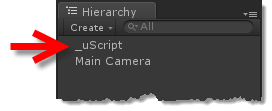
When saving your first graph, uScript will have created a new GameObject in your open scene named "_uScript". This is the Master GameObject
that uScript will use for many default things it does. In this case we also told uScript above to save our first graph to this GameObject. You can see this new GameObject in the Hierarchy tab in the Unity Editor:
A gizmo in the Scene tab:
uScript uses some of its own gizmos in Unity to help you find things in your Unity scenes that are uScript-related. In this case you can see a gizmo on the _uScript GameObject that uScript created for the scene (the little "M" on the Gizmo stands for "Master GameObject"):

Step 10 - A great way to figure out what you want to do when visual scripting is to create a simple sentence for what you are trying to do and then to break that sentence down into the parts of the graph you will need to make.
In this case the sentence might look like this:
"When the player presses the left or right arrow keys, the Cube will rotate left or right."
Now let's break that sentence down into the things we will need to do in our visual script to make that happen:
"When the player presses the left or right arrow keys, the Cube will rotate left or right."
Ok, let's start with the first bit (When the player presses the left or right arrow keys)...
Step 11 - First we need to place and Event Node into our empty graph. Every uScript graph needs at least one Event Node in order to work. This is because Event nodes are the nodes that listen for the game to do things and then send out signals into your uScript graphs to allow you to trigger actions (Action Nodes). To learn more about nodes, see "Nodes".
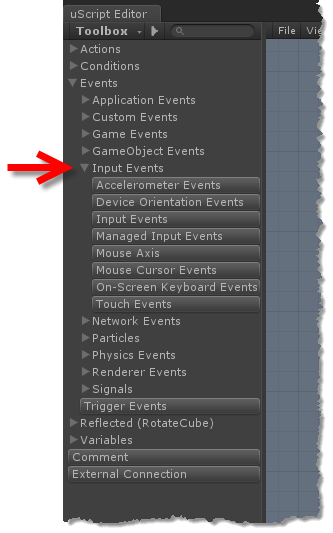
In this case we will want to place an Input Events event node. The Input Events node will fire any time the player presses a key-- just what we need for the "When the player presses" part! To place this node in your graph, we must find it in the Toolbox panel of the uScript editor (see "Editor Interface" for information about the uScript editor interface).
1. To find this node, open the "Events" node section of the node tree, then the "Input Events" section under that:
2. Once there, left-click on the "Input Events" node button to place one on the uScript Canvas.
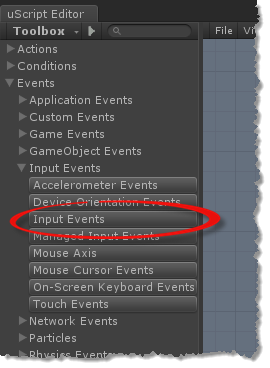
You should now see a single Input Events selected (selected nodes highlight in yellow) in the center of the Canvas:
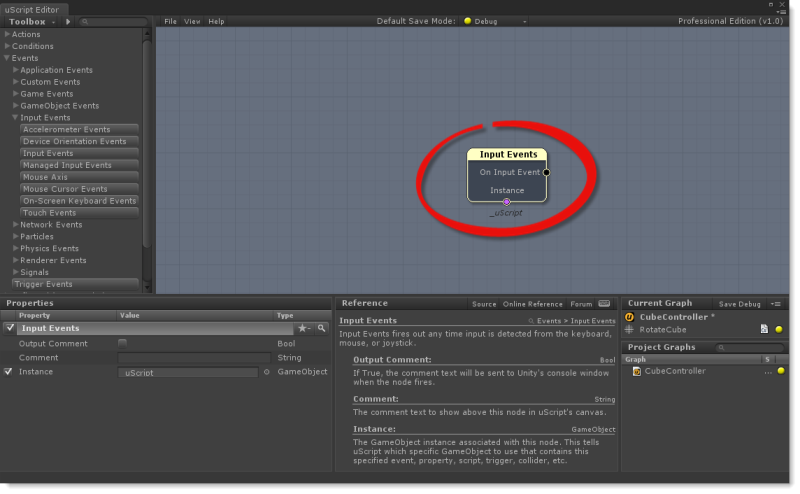
One thing to notice is that this node has an Instance socket at the bottom of it (most Event Nodes do). It was automatically assigned to the Master GameObject (_uScript):
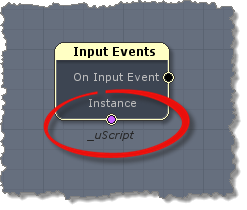
When a node has an Instance socket, it just means that the GameObject assigned to the Instance is the one responsible for listening to the events from Unity. In many cases, uScript will just assign this to the Master GameObject in your scene automatically so you won't need to worry about it-- but for some nodes you will need to manually assign the GameObject to use for it to work properly (or at all). An example of this would be the Trigger Events event node. You would want to tell Unity exactly which trigger GameObject it should use (because you could have many triggers in your scene and it wouldn't know which one to use otherwise!). See the "Instances" section of the "Key Concepts" topic for more information.
Step 12 - We now have an event node that will fire any time a key is pressed. However, we only care about when the left and right arrow keys are pressed (remember the "the left or right arrow keys" part of our sentence?).In order to filter out other key pressed we need to add some Input Events Filter action nodes to our graph.
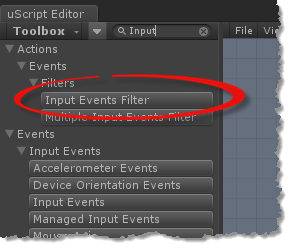
1. As always to place new nodes, go to the Toolbox Panel in uScript. Instead of hunting through the full list of nodes to find the one we want, let's use the filter field to find it quickly:
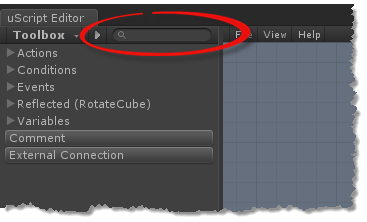
Inside the Toolbox's search filter, type "Input" (without the quotes). Notice how the contents of the Toolbox changes to just show anything with the word "Input" in the name. It also auto-expanded the results for you so you can easily see everything inside the node tree:
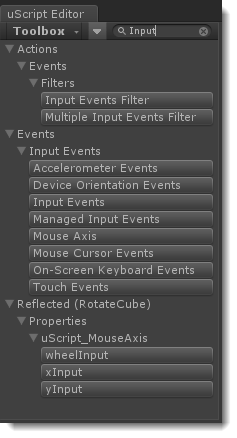
2. Click on the Input Events Filter button once to place an instance of the node on the Canvas:
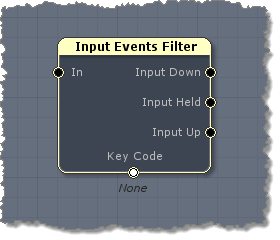
You should now see a selected Input Events Filter node on the Canvas-- most likely on top of, and covering, the Inputs Event action node if you have not yet moved that node or panned the canvas:
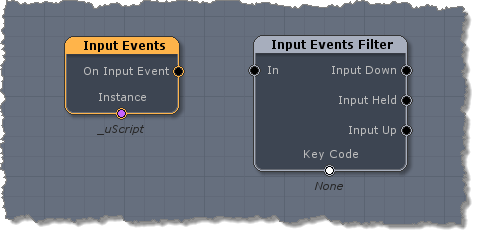
3. Let's move this node to the right of Input Events action node by left-clicking on the node and continuing to hold down the left mouse button while dragging the mouse to the right. Once you have done this, you graph should look similar to this:
4. Now let's connect the two nodes together with a Connection Line. To do that, just left-click inside the little black "On Input Events" socket on the right side of the Input Events action node and drag your mouse over to the "In" socket on the left side of the Input Events Filter node. While doing this you should see a yellow line coming off the node's socket to your mouse pointer. Make sure your mouse pointer is in the center of the "In" socket's black area when you let go in order for the connection to be made (it should light up yellow):
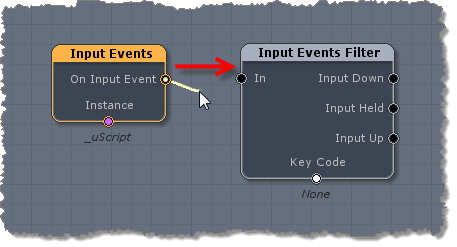
Once the connection is successfully made, you should see the two sockets connected with a black Connection Line:
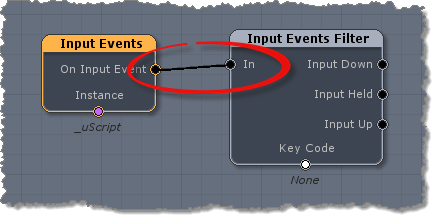
Connection Lines are how you tell uScript what nodes should fire and in what order. In this case we are telling uScript to run the Input Events Filter logic once it receives a signal from the Input Events action node (which it will every time the player pressed a key). To learn more about Connection Lines, see "Graphs".
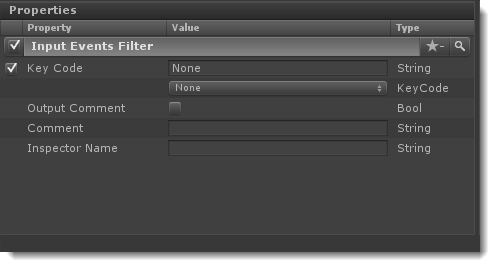
Step 13 - Now we need to set up the properties of the Input Events Filter node to tell it what key we want it to listen for. To do this, select the node (it will highlight yellow). When you do this you will see the contents of the Properties Panel in the lower left of the uScript editor change to show you the properties of the selected node (the Input Events Filter node in this case):
Also note that uScript's Reference Panel also updates to display the node help text to describe exactly what that node does and a description of it's properties. This is very useful for learning about what each node does:
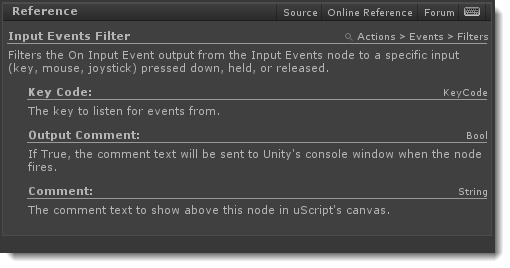
1. As you can see from the node's help text in the Reference Panel, we will want to change its "Key Code" property to tell is what key we are listening for:
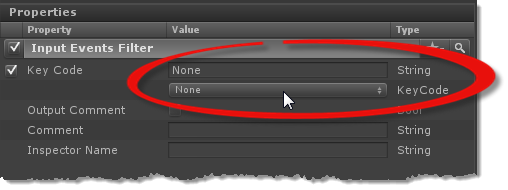
Select the pulldown list for this property in the Properties Panel and scroll down/choose "Right Arrow":
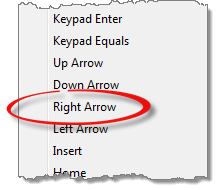
Once you have done that, you will see "RightArrow" appear in the String field as well as under the node's "Key Code" socket in the graph:

Note! - you could optionally have typed "RightArrow" into the property's String field and it would find it in the pulldown for you. Once you know Unity's names for the keys this can be hand as their Key Code pulldown list can be pretty unwieldy (especially in Windows).
Step 14 - Now let's save the graph so we don't loose our work in case a meteor hits or something! You can do this in one of three ways:
A. Use the hot-key Alt+S to save the open graph (note that the standard Ctrl+S won't work to save your graph because Unity has that reserved-- it will save your Unity scene instead).
B. Select "Save Graph" from uScript's File menu (don't worry about all those other save choices for now!):
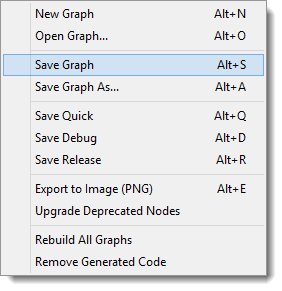
C: Use the Save button in the Graphs Panel in the bottom right of the uScript editor:
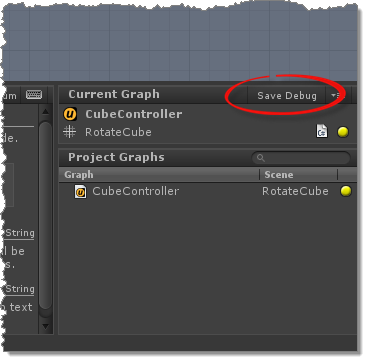
Remember that whenever you save, uScript will rebuild the graph's C# script file, triggering Unity to rebuild the scripts.
Once your graph has been saved, we are ready for the next part. Remember the last part of our logic sentence ("Cube will rotate left or right"? Let's work on that now...
Step 15 - Now we are ready to rotate the Cube to the right when your are holding down the Right Arrow key! uScript actually has several action nodes that allow you to rotate GameObjects in different way, but the one we want to use in this case it the Control GameObject (Rotate) node. This is because this node was designed to work when it is receiving a constant signal every tick of the game-- from like when you are holding down a key on the keyboard. Other rotate and movement nodes in uScript are setup to work when just receiving a single signal to the node and then handling the rotation/movement over time internally.
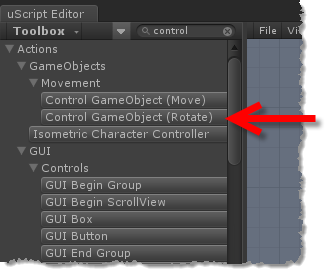
1. Lets place a Control GameObject (Rotate) node onto the Canvas. Find it in the Toolbox by either navigating to Actions/GameObjects/Movement section, or by first typing "control" into the Toolbox's search filter to have it appear more quickly, and then click the node button:
2. Once the node is on the graph, move it into place to the right of the Input Events Filter node. Then create a Connection Line between the Input Events Filter node's "Input Held" socket and the Control GameObject (Rotate) node's "In" socket:
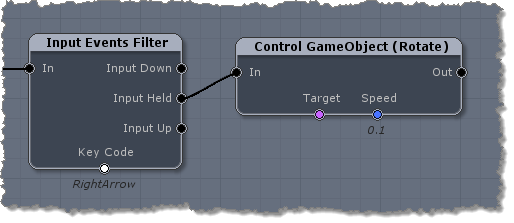
By hooking this new node up to the "Input Held" socket of the Input Events Filter node, we are saying we want to send a signal to the Control GameObject (Rotate) node as long as the RightArrow key is being pressed by the player.
Step 16 - Now we need to setup the properties of the Control GameObject (Rotate) node so that it knows how we want it to rotate the Cube. Select the node and change the following properties:
1. First we need to set the Target property to point to the GameObject in the scene we want the node to rotate-- in this case the Cube. Select the little browse button to the right of the Target field to bring up the asset browser:
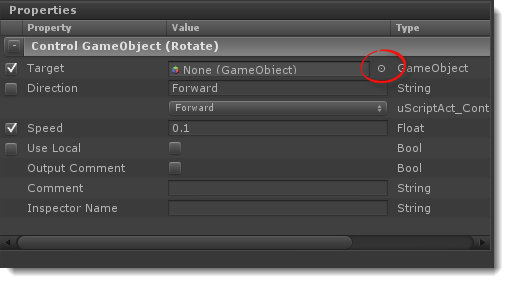
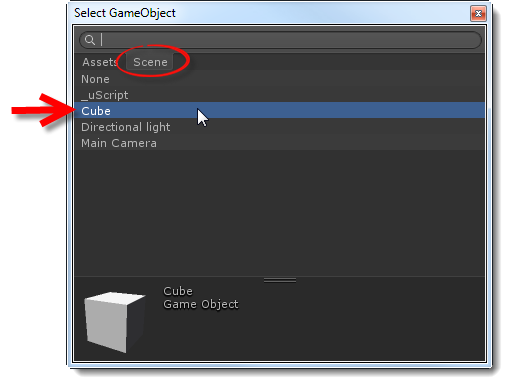
Then select the "Scene" tab in the browser window and double-click on the Cube GameObject in the list:
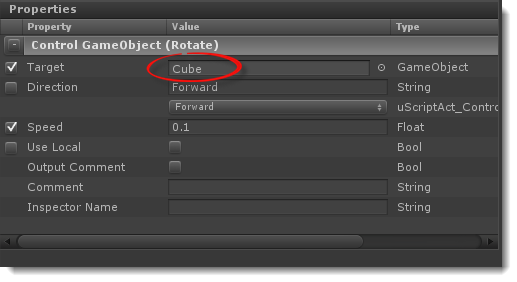
You should now see the Cube GameObject in the Target property's field:
2. Now we need to tell the node which direction it should rotate the Cube. Since this node get's a signal when the RightArrow key is pressed, lets assign the Direction property to "Right". Do this by selecting "Right" from the pulldown list next to the property:
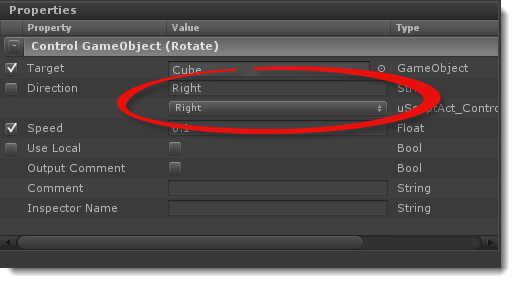
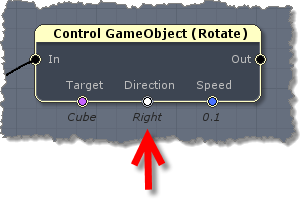
Also, let's check the box to the left of the Direction property. This will expose this socket on the node, allowing us to see what direction it is set to without needed to select the node and look in the Properties Panel (to learn more about what can be done with the Properties Panel, see the "Properties Panel" section of the "Editor Interface" topic):
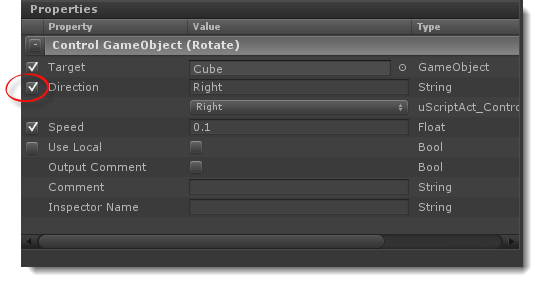
Once you do this, you will now see that socket appear on the node (this is also known as "exposing" the socket to the graph):
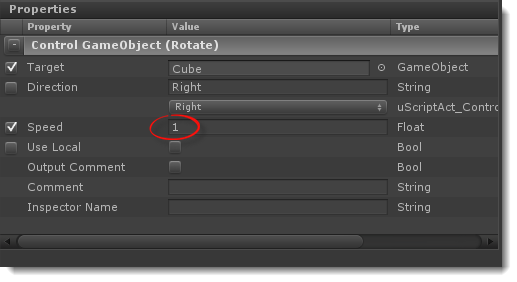
3. Lastly, we should set the Speed property a little higher so that the Cube will turn quickly. Let's set it from "0.1" to "1" (10 times as fast):
Step 17 - You should now have a graph that looks like this:

1. Let's save our graph again (using the Alt+S hot-key or one of the other save methods). Note that it is very important to save your graph after making any changes or additions to it because this is when uScript will also build the C# script file Unity will use when you run the game. If you don't save your graph after making changes, those changes will not be used when the game is run!
2. Now that our graph is saved and the scripts updated, let's close the uScript editor and run the game by pressing the play button in Unity:

3. Once the game has started, try holding down the Right Arrow key on your keyboard. You should see the Cube turning right. Stop pressing the key and the Cube will stop rotating. Press the key again and it will begin turning to the right more. Success!
Now try pressing the Left Arrow key. Nothing happens as expected-- because we haven't set that part up yet! Let's do that now!
4. Press the Play button in Unity again to stop the game from playing. Then re-open the uScript editor window. Your last open graph (CubeController) should be already loaded and ready to add to!
Step 18 - Now we need to setup the logic for when you hit the Left Arrow key. Luckily the nodes and logic to that is the same as the Right Arrow key setup with a few minor property changes, we can take a shortcut!
1. Let start by "Box Selecting" the nodes we want to copy. To do this all you need to do is press the left mouse button on the Canvas to the top left of where you want to start your selection box and continue to hold down the left mouse button while dragging your mouse pointer to where you want your box selection to end.
While doing this, touching the selection box will become selected (highlighted in yellow):
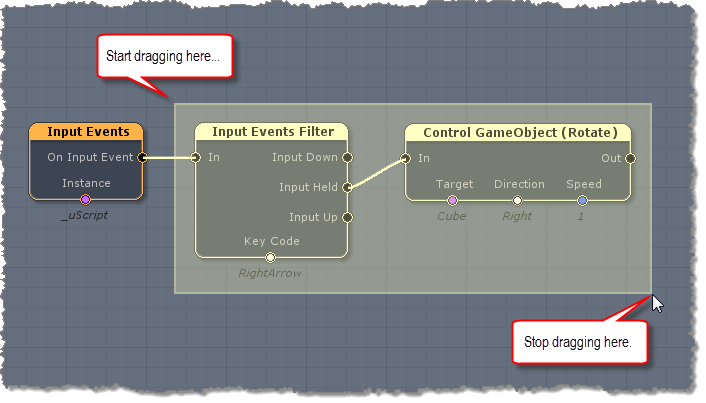
2. Now you can copy and paste the selected nodes. You can do this by either using the standard Ctrl+C (for Copy) and Ctrl+V (for Paste) hot-keys (Cmd+C and Cmd+V on Mac), or by right-clicking on the selected node and using "Copy" from the context menu that appears. If you use the context menu, you would then right-click on a blank spot on the Canvas where you want your new node pasted and again right-click and choose "Paste".
3. Move the newly pasted node underneath the existing one so it looks something like this:
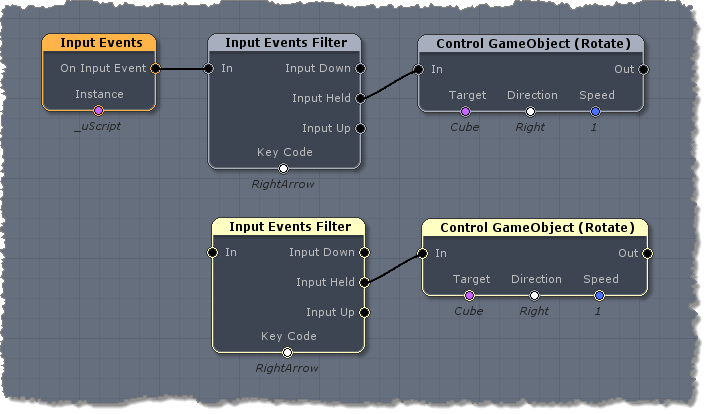
Note! - depending on the size of your uScript editor window, you may soon need to start scrolling around the Canvas as your graph gets bigger than can fit on screen at once. To scroll the Canvas, you can either hold down the middle mouse button while moving the mouse or use the Alt+Left Mouse Button option while moving the mouse. To learn more about navigating around the Canvas, see "Canvas Navigation".
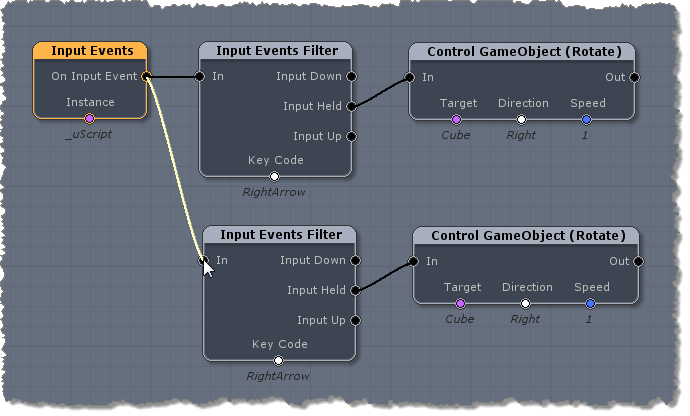
4. The first thing we need to do now is to connect the Input Events action node to the new Input Events Filter node. To do this, let's drag out another connection line from the Input Events event node's "On Input Event" socket to the "In" socket on the newly copied Input Events Filter node:
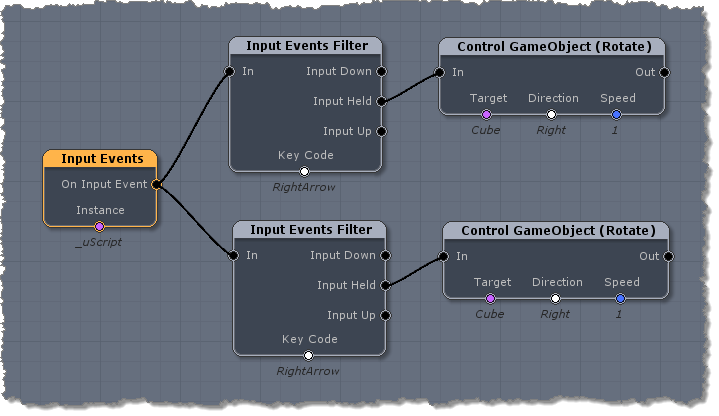
5. Now let's select the Input Events action node and move it down a bit on the Canvas so things look a bit more balanced in our graph (note that the node positions don't at all effect how they work-- I just like a clean graph!). Your graph should now look something like this:
Step 19 - You now have two sets of nodes hooked up with the exact same properties. Let's change the necessary node properties to get the Left Arrow key working properly:
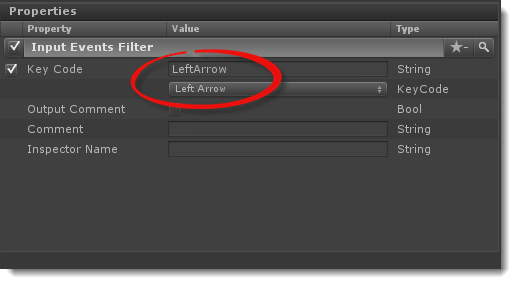
1. First we need to set the lower Input Events Filter node to instead look for the Left Arrow.
Select the new Input Events Filter node and change its Key Code property to the Left Arrow just like you did the original node for the Right Arrow in Step 13 (remember that you could just type in "LeftArrow" (without a space or the quotes) into the String field to have it find the correct selection for you quickly):
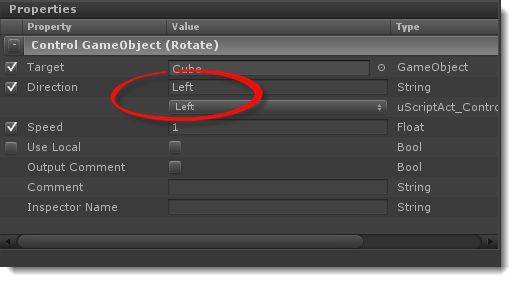
2. Now we need to change the lower Control GameObject (Rotate) node's Direction property to "Left". Select the node and change that property now:
Your final graph should now look like this:
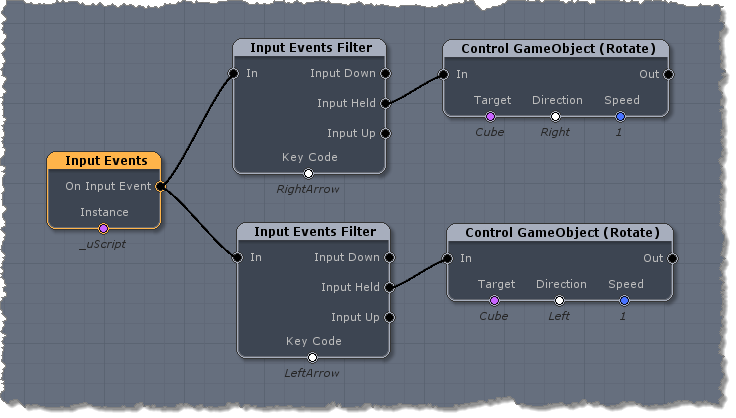
Notice how this graph reads a lot like our original sentence - "When the player presses the left or right arrow keys, the Cube will rotate left or right."
3. Now save your graph and close the uScript editor because we are done!
Step 20 - We are now ready to test our final graph!
1. Once again press the Play button in Unity:

2. Go ahead and press the Left and Right Arrow keys to watch the Cube rotate left and right.
Tutorial completed!